Making Your Own Holiday Garland
Supplies: Clippers, 1/4 Inch. to 1/2 Inch. Diameter Rope for Thick Garland, Use Jute Twine for Narrow Garland, use 24 or 26 Gauge Spool Wire, Selection of Greens & Flowers that Dry Well [eucalyptus, pine, bear grass, pepper berries, lemon leaf, boxwood, hydrangea, statice, straw flower, yarrow etc.]
Check out these easy steps to making your own garland for a fireplace mantle, stairway, doorway, hearth, kitchen or table centerpiece. You shouldn't limit creativity to the holidays...Garlands add warmth to any room & pieces of furniture.
- Select a greenery & the flowers that will make up the garland.
- Measure the mantle, hearth or whatever you are decorating & add 24". Cut the rope to the correct length. (24" is added for a nice swagged look.)
- Tie loops at each end of the rope for hanging.
- Separate each kind of greens & flowers, and cut into pieces of about 6" to 7" long. Cut several longer & stronger pieces of greenery, approximately 10" to 12" long & set aside.
- In your hand, make small "bouquets or bundles" with all the varieties of greens & flowers.
- Start at one end & lay one "bouquet" on the top of the rope.
- Attach this "bouquet" with 24" gauge spool wire to the rope. Simply wind the wire several times around the stems of the "bouquet." Do not cut the wire.
- Add another "bouquet" so tips overlap stems of first "bouquet," & attach to rope.
- Now, to make the garland sturdy, you should attach one of your longer/stronger pieces of greenery to the back side of the rope. This larger piece of greenery needs to be the length of two "bouquets."
- Repeat the process, (two "bouquets" front & one longer/stronger piece of greenery back) until you fill the rope with beautiful greens, flowers or berries. Secure wire by catching it under the last loop of wire.
Flower Selection, Preparation & Care
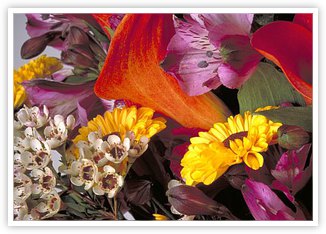
Pick the Flowers: Start by selecting fresh cut flowers. Look for blooms that are just starting to open, have firm stems, healthy leaves, & erect, healthy petals.
Getting Them Ready: Pull off stem leaves that will be covered by the vase water. In a water-filled bowl or basin, submerge flower stems, & then cut them diagonally. This step will help the flowers absorb cut flower food, while eliminating stem-clogging bacteria.
Feed the Flowers: Always start with a clean vase and add a packet of cut flower food to warm water. The use of flower food has been shown to increase the life of fresh flowers by several days. Individual packets are available wherever cut flowers are sold.
Show Them Off: Display the flowers in a cool, draft-free location, away from harsh sunlight and heat vents. Don't set flowers on top of a TV. Top off water daily and replace totally after several days. Flowers like to be spray misted too! When you're down to the last few blooms, change to a smaller vase.
Flower Arranging 101: The Do's & the Don'ts!
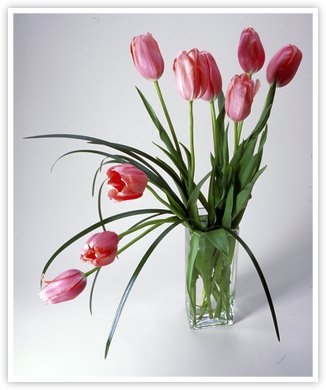
DO decide where you will place the flower arrangement before you make it so you can determine if the finished piece should be tall or wide or round & full.
DO select a container that is appropriate for the decor and/or theme of the arrangement. Consider the material the container is made of-brass, silver, glass, pottery, plastic; the shape-square, round, tall & slim, short & stout; & the style-sleek & modern, ornate & nostalgic, tailored & conservative, or free formed & artistic.
DO choose a vase that is in proportion to the flowers. Often the vase should make up one half to one-third the size of the total arrangement (for example, three-foot tall gladiolus needs a 12 - 18" vase).
DO make sure the container has appropriate water retaining capacity in proportion to the quantity and size of the flowers [For example: sunflowers don't fit in a bud vase].
DO use tall, oval shaped vases for arrangements which incorporate line flowers, such as Liatris (gayfeather), gladiolus, snapdragons, Delphinium, & bells of Ireland.
DO use vases with a belly (such as gingers jars or urns) for mass & filler flowers. Mass flowers include carnations, roses, lilies, sunflowers, daffodils, tulips, & chrysanthemums. Filler flowers include baby's breath, statice, Queen Anne's lace, waxflower, & Saponaria.
DO condition the flowers by cutting stems diagonally under the water. This prevents air bubbles forming, which can block water from being drawn up inside the flowers. The diagonal cut allows a wider surface for the flowers to drink. Remove all foliage from stems which will be under water. This discourages bacteria from forming due to decaying foliage in the vase water. You need to add the right amount of floral preservative to the vase water.
DO re-cut the flower stems every two to three days and change the vase water.
DON'T combine flowers which do not naturally blend well. Consider the morphology, texture, as well as the color. For example, bold, angular, shiny tropical flowers such as bird of paradise do not blend well with softer, delicate, ruffled flowers such as sweet peas.
DON'T use tall arrangements for dinner table centerpieces and expect the guests to be able to see each other across the table!
DON'T set flowers in a drafty or warm place, such as in an open, sunny window or on top of the TV. The drafts and heat will cause the water to rapidly evaporate out of the flowers $ndash; and the vase – and leave you with a wilted bouquet.
Beautiful Tabletop Bouquets
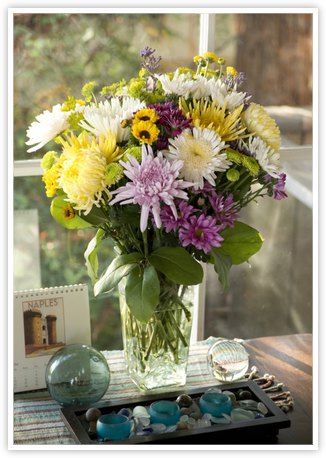
Ultimately, you'll want the floral arrangement to be balanced and in proportion. Balance is achieved when a design gives a feeling of stability. This is accomplished by establishing a pattern with flowers in the bouquet. Proportion is the visual relationship when flowers, foliage, and container appear appropriate together.
You can create balanced and proportional arrangements in the way of a hand tied bouquet. An arrangement of hand-tied flowers lasts very well because flowers always last longer in a vase of water & floral preservative versus arrangements designed in floral foam. When you master the Euro/Spiral bouquet making technique, you'll be able to make bouquets for every room and every body.
Supplies: Clippers or Floral Designer's Knife, Selection of California Cut Flowers, Selection of California Greenery, Florists String or ½" Ribbon, Bucket or Vase of Water with Floral Preservative.
Here are some easy instructions for making your own Stand Up Bouquet:
- Decide where the flowers will be placed... dining table, living room, or a small fragrant bouquet for the kitchen table.
- Select your favorite flowers & greens.
- Before you begin construction of the bouquet, gather and clean all flowers & foliage that will be used. Remove foliage that will fall below your thumb while making the bouquet.
- Gather 3 to 5 stems of flowers in your hand. Hold them vertically between your thumb, index finger, and third finger. (The lower you hold the flower stem, the longer and larger in circumference your hand-tied bouquet will be.)
- Begin the spiral placement by placing additional flower stems at a 45 degree angle against the rest of the bouquet. Do not lay the stems on top of each or let them cross, instead, lay them next to each other. After 3 to 5 stems have been added in this fashion, twist the bouquet (either clockwise or counter clockwise, depending on what feels comfortable in your hand. Add additional flowers using this same method. You will be creating a spiral of flowers. Keep all the heads/blooms & greens at the same height.
- When you have achieved a pleasing result bind the flowers. Bind the flowers by wrapping the florist string several times around the flower stems. Leave several inches of thread to tie off the bouquet. Bring the thread through the center of the flowers & pull the thread tightly. Cut the thread and tie it to the loose end.
- Cut the ends of the flower stems very straight.
- Finish the bouquet off with a complementary ribbon if desired.
- To make the bouquet literally stand on end, by itself, gently spread the stems and, if necessary, trim the center stems slightly shorter than the rest of the bouquet.
- Place the bouquet in the center of the dining table WITHOUT A VASE. Your guests or family will rave. At the end of the dinner party, give the bouquet a fresh cut, and put your beautiful hand-tied bouquet in a vase of water so it can re-hydrate.
Tips on Working With Floral Foams
(Provided by the California Cut Flower Commission)
Flower Conditioning: First and foremost, realize the importance of properly conditioning the flowers before placing them in an arrangement. This involves giving the flowers a fresh cut at the stem, removal of foliage that would fall below the water line, and placing the flowers in clean bucket filled with water and a floral food solution. In a commercial retail florist shop the flowers are then "hardened" by placing them in a cooler at the proper temperature. Home based designers should simply allow their flowers to drink water for several hours before styling begins.
Proper Use of Floral Foam: Foam saturates best when allowed to free float in a tub in a flat position. There should be enough water to fill the brick while allowing it to float free when fully saturated. While all foams soak in a few minutes, the lighter foams soak more quickly than the heavier foams.
Add Water Regularly: Floral foam is not a substitute for water! The water lost by evaporation or consumed by the flowers must be replaced. When the design does not call for a container, the brick should be wrapped in foil or other nonporous material in order to minimize water loss.
Floral Foods: Floral foods or preservatives should be used in preparing the soaking solution. It is a well documented fact that preservatives are very beneficial in extending cut flower vase life. Tests show that the first 24 hours is the critical period in the use of floral preservatives. The use of preservative gives the designer the added assurance of more brilliant colors, larger & longer lasting blooms.
Leave a Water Reservoir: To insure the flowers always have an adequate water supply, choose containers which provide a reservoir for water. If it is difficult to add water to the arrangement, it is certain the flowers will be thirsty & will not enjoy maximum life.
Let Floral Foam Aid in Your Design: Many florists cut floral foam level with the top of the container. Instead cut the foam to extend above the rim of the container, and you'll be able to place the flower stems horizontally over the edge. This permits much greater design flexibility. Foam has a wicking or capillary action which will draw water into the flower cell as long as there is a readily available supply of water.
Making Your Own Autumn Bouquets
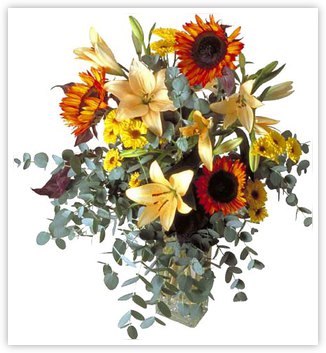
The rich & distinctive colors of autumn foliage command you to design your own seasonal bouquet. Bouquets are simple to put together - much easier to assemble than a formal flower arrangement - & can be enjoyed just as much. Follow these easy steps and make your own Autumn arrangement!
- Gather a variety of colorful leaves, greens, and fall flowers from around the garden. The stems should be at least 12 inches long.
- Remove the leaves & foliage from the bottom six inches of the stems.
- Place the longest stem in the left hand (if you are right handed).
- Add several more bits of greenery at an angle to the first stem.
- Continue adding flowers & greens to your left hand until the bouquet has a rounded appearance.
- Fill in with flowers & greens all the way around the bouquet.
- Tie a rubber band around the stems just below the leaves. There should be a few inches of stems showing below the rubber band.
- Trim the stems with pruning shears so they are all the same length.
- Cover the rubber band with several strands of raffia or a fall-colored ribbon.
Things to Consider
- Use liquid amber, maple, nandina, pink or red oak & persimmon leaves to add fall color to bouquets. Try including some colorful berries.
- Chrysanthemums, marigolds, and asters are traditional fall flowers; they last a long time in bouquets or flower arrangements.
- Place the finished bouquet in a vase or bowl of warm water to help it last longer.
- Make a bouquet as large or as small as you like.
- Bouquets are meant to be shared - make one for a friend!
Tips For Using the Right Container
Your bouquets & flower arrangements can be shown off in many different types of vases & containers. Here are some great considerations when choosing the perfect container!
- Get Creative! The possibilities are endless--from an antique teapot or brass urn, to an elegant crystal vase, or a simple glass jar. Avoid containers made of steel or iron.
- Make sure the vase is leak proof, & has a neck & water reservoir large enough for the flowers to fit comfortably.
- For some flower arrangements you may also want to use a brick of floral foam--a substance that, when saturated, holds flowers in place.
- Be sure to soak the foam in water containing a floral food solution. Let foam absorb water at its own rate. Cut it to fit the shape of the container, leaving enough space for reserve water. Floral foam cuts easier when wet.
- If the flowers sometimes don't stand up straight, it could be that the vase is too short for the flowers, or the flowers are too tall for the vase! A good rule of thumb: the height of the vase should be about half to one-third as tall as the flowers.
- Build a grid across the top of the vase with clear tape. Then place flowers within the grid.
- If you've cut my flowers too short, don't worry. Just add pebbles or marbles to the bottom of the vase or simply float the head of a broken flower in a clear bowl for a charming display.
- To avoid "spill over" when watering the flowers, use a kitchen bulb-type baster to reach into narrow vases & full arrangements.
Line, Mass & Fillers
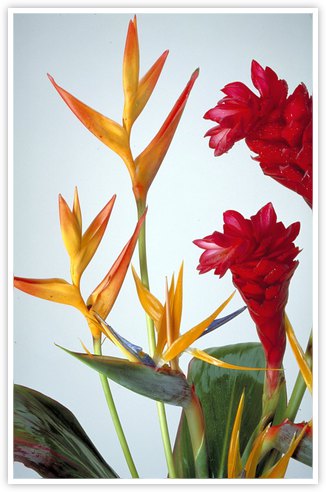
It's truly remarkable when you think about how different types of flowers & foliages are combined to make beautiful bouquets. Flowers have distinct shapes, fragrances, & colors. In learning about floral design, let nature & your own creative inspiration be your guide. & above all, have fun! Here are a few pointers to consider when you're creating the masterpiece!
Line Flowers are tall, & as the name implies, give the bouquet height, width, & a balanced look. Branches & tall foliage can serve as line flowers. Most line flowers have buds growing up a center stalk.
Examples of line flowers are: gladiolus, liatris, snapdragon, delphinium, tuberose, veronica, curly willow, bells-of-Ireland, stock. Line flowers, by themselves, look striking when placed in a tall cylindrical vase.
Mass Flowers will give the bouquet weight – or mass – and are generally round and full faced. Sometimes they are referred to as "face" flowers. They are usually the focal point of color and interest in a bouquet. Most mass flowers come with only one flower on the end of the stem.
Examples of mass flowers are: rose, carnation, gerbera, sunflower, lily, daffodil, tulip, iris, freesia, zinnia, alstroemeria, protea, chrysanthemum. They're a great choice for a simple, quick vase full of flowers and are often sold in bunches.
Filler Flowers (stems with a lot of little flowers) and foliage will round out the bouquet and give it a soft, full look. Casual, fresh from-the-garden bouquets use an abundance of filler flowers to visually connect mass and line flowers.
Examples of filler flowers & foliage are: baby's breath, feverfew, Queen Anne's lace, ferns, heather, statice, eucalyptus, aster. Just a few sprigs of filler flowers, alone in a vase, can give a sense of simple elegance to any room, and many filler flowers are good candidates for drying.
The Information in this section was provided by the California Cut Flower Commission (CCFC). Please visit them at http://www.ccfc.org
Over 25 Years Experience Shipping Flowers
We’ve shipped hundreds of thousands of bouquets over the years. Our designers
know which blooms ship best, how to pack them, and buy only top-rated blooms.
 Responsive Customer Service
Our friendly and knowledgeable customer service team will help you with any questions. You may also place orders over the phone.
Mon-Fri: 7am - 4pm PT

 Rated Customer Service
Assuring satisfaction to over 2,000,000 CUSTOMERS since 1994 has earned us an
rating from the BBB. A BBB Accredited business since 10/05/2005
100% Satisfaction Guarantee
Our 100% satisfaction guarantee ensures that every item you purchase at The International Flower of the Month Club meets your high standards or we will replace it or refund your purchase.

